
Showing posts with label ukulele. Show all posts
Showing posts with label ukulele. Show all posts
Monday, May 14, 2012
Dorm chair mandolele
A while ago I spotted a broken chair in the basement. I scavenged some oak from it, and finally got around to using it this past weekend. In a one-night extravaganza of poor craftsmanship, I put this together.


Monday, January 23, 2012
machine tuners


These are the beginnings of the blocks that will hold the worm (screw) against the gear on the tuner.

---------------------------------------------------------------------------------------------------------
Update: 3/16/12
I never actually got around to finishing this for a couple of reasons.
1, I made the machine tuner pegs too short. They didn't slide all the way into the head of the instrument..
and 2, I got over it. Wood tuning pegs are more than sufficient for this lightweight uke. I reshaped the ones that were giving me trouble and applied a bit of resin (epoxy minus hardener) to them. After the resin dried out a bit, they got good and sticky. Everything's cool now.
Also, I looked at a real violin up close the other day. They're beautiful! A truly fit design.
Monday, January 16, 2012
Tcopter flight testing and more ukulele
After some minor controls hiccups, I got tcopter flying.
Thanks to Annie for filming.
One thing I noticed right away about the flight was that it was less floaty, zippy. It seemed sluggish compared to beforehand. Now, the setup is a bit heavier than last time, but only by maybe thirty grams. Then again, that's about 15% more than last time. Too bad Newton wouldn't let me get away with that.
Each experience I have like this reminds me to KEEP THINGS LIGHT! When they're light, they take less force to move, so they can stay in the air longer. Of course, I could slap on a bigger power system to give it more force to thrash around, but then the frame would have to to be built (heavier) to withstand the extra force.
I'm currently looking into solutions for making a really light frame that can still take some abuse. One trick that I learned from some friends in DBF was to sandwich end-grain balsa wood between sheets of carbon fiber. It makes super light (not much heavier than balsa) and very stiff spars.
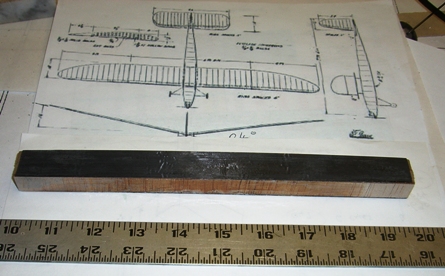 |
| first google result for "end grain balsa spar" |
In other news, I've been having a lot of fun with the ukulele (when it's in tune). The nut is slightly angled, so the distance from it to the first fret is just a bit longer than it should be for the low string. I made a quick fix by sticking a chunk of bamboo under the string shoved up against the nut.
 I'll rip the nut off and re position it later.
Also, I've noticed that some of the drier days make the pegs shrink and slip. I can still tune them, it's just a bit more involved than I'd like. Being that it's IAP, I drew up some plans for machine tuners:

Also, I've noticed that some of the drier days make the pegs shrink and slip. I can still tune them, it's just a bit more involved than I'd like. Being that it's IAP, I drew up some plans for machine tuners:

I planned on using a drywall screw as the worm gear, filing off the unnecessary bits of screw. I was also thinking of cutting the large gear myself.. with a hacksaw. This will have to wait for another long weekend, because I fear it will take many hours.
Before you tell me that I can buy cheap and much nicer machine heads for a few dollars each, just let me say that my stubbornness to buy as little and make as much as possible for this uke has held strong.
Machine tuners will happen.
Tuesday, December 27, 2011
Ukulele (guitar-like thing megapost)
A few days ago, I started building an ukulele. I've wanted to attempt a stringed instrument for a while, and winter break seemed like a good time to start.
| Type | Scale length[26] | Total length | Tuning[27] |
|---|---|---|---|
| soprano or standard | 13" (33 cm) | 21" (53 cm) | A4-D4-F#4-B4 or G4-C4-E4-A4 |
| concert | 15" (38 cm) | 23" (58 cm) | G4-C4-E4-A4, or G3-C4-E4-A4 |
| tenor | 17" (43 cm) | 26" (66 cm) | G3-C4-E4-A4, G4-C4-E4-A4 , or D4-G3-B3-E4 |
| baritone | 19" (48 cm) | 30" (76 cm) | D3-G3-B3-E4 |
Design

I first found some diagrams to get an idea of scale. A search turned up this diagram of an ukulele neck, and I used this as a template for mine.
A great little program called FretFind helped me layout the locations of the frets, as well as sizes of the neck, nut and bridge.
Build

I'm using a machinist's vise. I duct taped some thin ply scrap to the jaws so it wouldn't mark up the wood


I wanted to inlay a fretboard, something a bit more durable and nicer looking than the poplar. To make room for the inlay, I set the blade on the table saw to about 3/16" and took some slices out of the top of the neck.
After that, it was easy to clean it up and flatten it out with a straight chisel.
 |
| glue applied |
 |
| The fretboard - It's a piece of bloodwood scrap that my Dad had lying around. |
 |
| The spring clamps weren't as snug as I would've liked, so I later used C clamps instead. |


I opted out of using geared tuners since the tension on the strings won't be anywhere near that of a steel string guitar. Instead, I made wood tuning pegs.
That's a small piece of white oak that I sloppily cut with a coping saw. I whittled it down with a knife until it stopped looking so boxy, but it still wasn't round enough.


I hesitate to use the word lathe...
Enter the inverted cordless drill in a vise!
This worked surprisingly well. I'd put the smallest end of the peg in the chuck, operate the drill with my left hand, and manipulate a chisel with my right. I don't know the technical name for it, but I used a roller that's supposed to support long pieces of stock as the thing that I rest the chisel on.

The peg is a bit blackened in this photo because I rubbed it in coal dust. That seems to give it a bit more of a hold.
Back to the neck

I trimmed the excess inlay from the neck with my trusty coping saw.

After some sanding...

With that done, I started shaping the head to accept tuners. I bored some holes and chiseled the rest.
Box Building

I read somewhere that cedar makes a good soundbox, so I dug through a stack of some old cedar siding that used to be installed on our house until I found some sufficiently not rotten pieces.
They're about 7/8" thick on one side, then they taper down to 1/4" or less on the bottom. I wanted the sides of my box to be thin, less than a quarter inch. I got to work with a plane to get them down to size.
It took a few hours. If I'd had access to a proper woodshop, I probably could have done it in a few minutes.

Here's the soundboard and the sides. I made the soundboard thinner than the sides because a thinner membrane generally means brighter sound.

Here's the tail end of the box
more to come..
Update 1/3/12: It's done as of a few days ago - here are the rest of the build photos:
Update 1/3/12: It's done as of a few days ago - here are the rest of the build photos:
 |
| box! I glued and tacked it together |
 |
| A piece of juniper harvested from our woods a few years ago |
 |
| piece of juniper carved into the nut |
 |
| first fret! I used the fret calculator mentioned earlier to position it just right |
 |
| clamping the bridge to the soundboard. I could have used about five extra hands while setting this one up. |
 |
| more frets |
 |
| flush cut saw used for cutting fret slots |
 |
| the soundboard was a bit flexy for my liking, so I added some maple bracing on the back (soon to be inside) |
 |
| done and strung! I cut the soundhole by tracing out a circle, then drilling out small holes all along the perimeter. |
 |
| linseed oil gives it some character |
Subscribe to:
Posts (Atom)