Plenty of people kitesurf on the water. Some people do it on land with large pneumatic tire'd skateboards. They can be had online for upwards of $200 or so.
I want to make a laminated deck. I decided to make a mold that could squeeze some layers of whatever together while the adhesive sets.
I scavenged some plywood from the N52 loading dock and cut them into rectangles of approximately the same size.
I sketched out a profile and did the cutting in parallel. I shot a screw through the layers to hold them together while cutting.
after separating the layers, I tediously spaced them with some of the semi-infinite crufted 3/8" threaded rod that appeared at MITERS one day. A faster way to do this might have been to cut interlocking orthogonal pieces like these:
perhaps more easily done on a laser cutter.
I tried a sandwich of three pieces of 3/16" spruce-pine-fir (i.e. low grade) plywood. The form didn't like that. The sections were not attached to one another with sufficient rigidity. I added more sections of rod to provide increased compressive strength where the straps attached. I also glued a piece of the thin ply to each of the mold halves.
While that set up, I started machining the trucks. I found a piece of 0.75" x 1.75" aluminum extrusion and drafted a shape which optimized for cross-sectional area of the finished product while avoiding all of the previous machining that had been done to it.
After bisecting the slab on the bandsaw, I started machining in parallel on the mill. All of the angles I got by wedging tidbits of material underneath one end of the parallels while clamping the workpiece in the vise. The more legit way of doing this might involve the use of a sine bar.
The big end mill is known as a shell cutter because it is hollow and mounts on an R8 shank arbor. I was surprised how cool the work and the tool stayed during machining. The local temperatures seemed high, indicated by the 'hot metal and burning lube smell,' but the tool and material were cool. The chips as they came off were quite hot.
yep, definitely not a 3D printer. This thick layer of chips is indicative of subtractive machining.
I debated pocketing the axles to make them a bit lighter. I'd never done any Finite Element Analysis before, so I fed dimensions to Autodesk Inventor until it puked rainbow beams.
I decided to pocket another day.
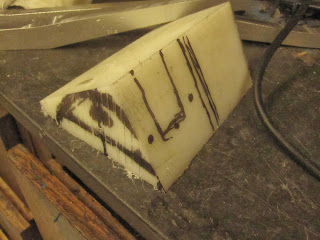
Again, I find the best way of designing with stock of unknown dimensions is to sketch right on the part.
the slots were done in a single pass with an enormous two flute 1" end mill. The corner chamfer on this cutter is about 1/8"
I machined a little plastic sleeve bearing for the 1/4" kingpin that will constrain the axle to the plastic bracket. I also milled slots for the springs to sit in.
I found this scale on a loading dock. Perhaps that's why it thinks that pocketing this part made it 150g heavier.
The last swapfest of the season happened. I bought some tiny tooling for the winter months.The deck is a story of great sadness and turmoil. Not pictured here is attempt #1, a downright failure at composite layup and forethought. Epoxy fail, not enough hardener, waste of nice crufted carbon fiber weave. I should have practiced on something less nice first.
okay, second try.
fiberglass? sheet. About 1/8" thick, pretty flexible.
trimmed to size, so that it might fit in the belly of the beast.
the beast


chenlina20160514
ReplyDeletelouis vuitton outlet stores
ray ban sunglasses
louis vuitton outlet
nike roshe flyknit
christian louboutin sale
oakley sunglasses
nike air jordan
toms shoes
louis vuitton handbags
michael kors outlet
louis vuitton outlet
oakley vault
jordan retro
gucci handbags
louis vuitton
ray ban sunglasses
coach outlet
basketball shoes
cheap jordan shoes
air huarache
polo ralph lauren outlet
adidas originals
christian louboutin outlet
burberry scarf
cheap jordan shoes
michael kors handbags
coach outlet store online
michael kors purses
michael kors handbags
air jordans
nike trainers uk
nike huarache
cartier watches
nike free runs
michael kors handbags
ray ban sunglasses outlet
toms shoes
jordan 4 toro
nike store outlet
michael kors handbags
as